Saltwater Aquarium Setup for Beginners: The Complete Guide
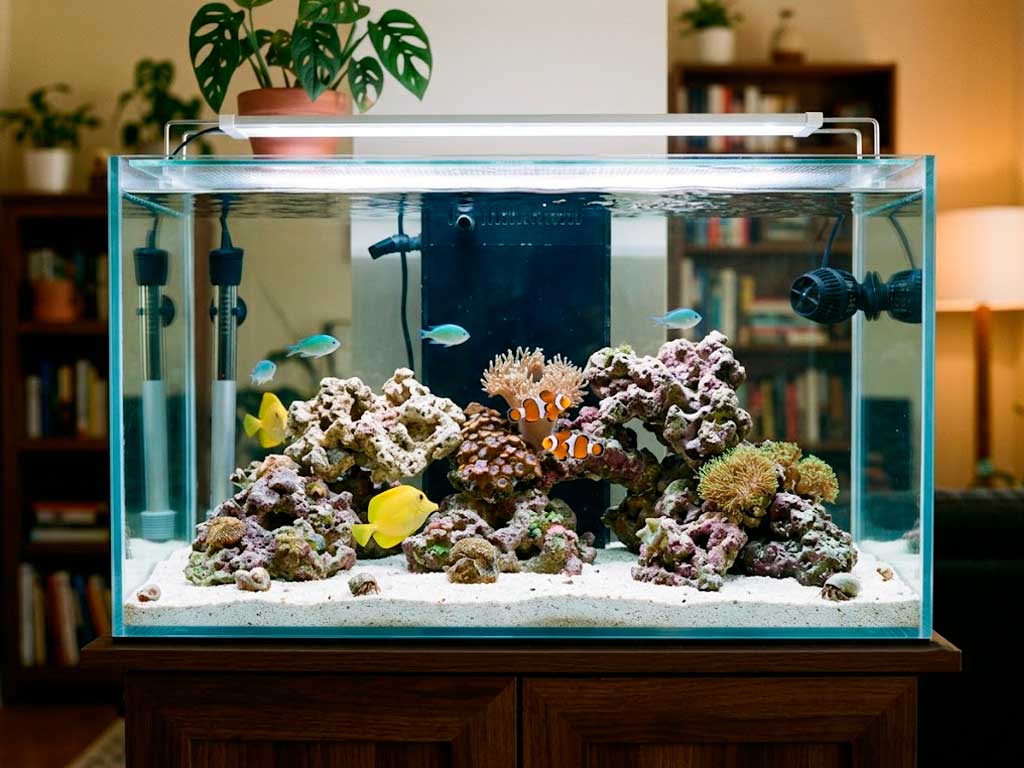
Saltwater aquariums have a reputation for being brutally difficult, and that reputation scares off a lot of people who would otherwise enjoy the hobby. The truth is less dramatic.
Saltwater tanks are not harder than freshwater tanks because the concepts are more complex. They are harder because the tolerance for sloppy habits is smaller, and the cost of skipping a step shows up faster.
This guide walks through the entire path from an empty tank to your first fish: choosing equipment, mixing saltwater correctly, cycling the system, and avoiding the mistakes that sink most beginner tanks in year one.
Several sections here, like protein skimmers, live rock, and coral selection, deserve their own deep dive, and we will link those out as they go live. For now, this is the map of the whole journey.
Read it in order if you are starting from zero, or jump to the section you need if you already have a tank running and just want to fix one piece of the puzzle.
Either way, the goal is the same: fewer surprises, fewer dead fish, and a tank that actually looks the way you pictured it when you first got excited about the hobby.
Quick answer: Setting up a saltwater aquarium for beginners means choosing a tank, mixing marine salt to a specific gravity of 1.020 to 1.025, cycling the tank until ammonia and nitrite both read zero, and only then adding hardy fish. Expect 4 to 6 weeks before your first fish goes in, and budget more upfront than a comparable freshwater setup, since salt, testing equipment, and lighting all add cost that freshwater tanks skip.
Freshwater vs. Saltwater: What’s Actually Different
Both systems run on the same underlying chemistry: pH, hardness, and the nitrogen cycle all work the same way whether the water is fresh or salty, covered in full in our aquarium water chemistry guide.
What changes in saltwater is the tolerance for error. Marine fish and invertebrates evolved in the ocean, an environment so vast and stable that a 2-degree temperature swing over weeks is significant. Your tank has to replicate that stability in a box of a few hundred liters, and that is where the real difficulty lives.
Salinity is the parameter that has no freshwater equivalent at all. Every other adjustment you make, from alkalinity to calcium, depends on getting salinity right first, so this single measurement earns an entire equipment category (the refractometer) that freshwater keepers never need to touch.
Cost is the other honest difference. Marine salt, a quality refractometer, stronger lighting for corals, and a more capable filtration setup all add up faster than an equivalent freshwater tank.
None of it is optional the way some upsells are in freshwater, which is why planning your budget before you buy anything saves you from a half-finished tank six weeks in.
Step 1: Decide Your Goal, Fish-Only, FOWLR, or Reef
Before buying anything, decide what kind of tank you actually want, since this single decision determines almost every piece of equipment on your shopping list.
Saltwater tanks fall into three broad categories, and each one comes with a different equipment list and a different margin for error.
- Fish-only (FO): The most forgiving path. No live rock or corals to keep happy, just fish and basic filtration. Parameters can drift a bit more without disaster, which makes this the easiest true starting point.
- FOWLR (fish-only with live rock): Adds live rock for natural biological filtration and a more realistic look, without the strict lighting and flow demands of corals. A great middle step for beginners planning to go reef eventually.
- Reef: Corals and often invertebrates alongside fish. Requires tighter control over alkalinity, calcium, magnesium, and lighting, plus real attention to water movement. The most rewarding path visually, and the least forgiving of neglect.
If you are brand new to saltwater, starting FOWLR and adding a few hardy soft corals once the tank is stable is a more realistic path than jumping straight into a full SPS reef. You can always add complexity. Removing it once corals are struggling is much harder.
Step 2: Choose Your Tank
All-in-one (AIO) kits bundle a tank, filtration, and often lighting into a single unit, which removes a lot of the compatibility guesswork that trips up first-timers piecing together a custom system.
For a first saltwater tank, an AIO is usually the more forgiving choice, since one manufacturer has already sized the pump, filter, and overflow to work together correctly.
The Fluval Flex 32.5 Marine Kit is a solid example of this approach. It comes with built-in LED lighting and filtration sized for the 32.5-gallon tank, which gives you enough water volume for real stability while staying manageable for a first build.
FROM AMAZON.COM
Fluval Flex 32.5 Gal. Marine Aquarium Kit — Black
Complete saltwater kit for fish and coral. Includes LED lighting, filtration system, and a curved-front 123 L glass tank at 32.5″ × 15.75″ × 15.35″.
Buy on Amazon.comAs an Amazon Associate, we earn from qualifying purchases. Happy Pet Zone may earn a commission when you click through to Amazon.com, at no extra cost to you.
Counterintuitively, bigger tanks are often easier for beginners than small ones. More water dilutes mistakes. A missed feeding, a slightly-off salt mix, or a skipped water change swings the parameters of a 10-gallon tank far more violently than the same mistake in a 40-gallon tank. If your budget and space allow it, sizing up from your first instinct usually pays off in fewer crises.
Step 3: Core Equipment You Actually Need
It is tempting to buy every piece of gear you might eventually want on day one. Resist that. Protein skimmers, UV sterilizers, refugiums, and dosing pumps all have their place, but adding them all before your tank has even cycled is a common way to over-filter and over-clean the water, which actually harms corals more than it helps.
Start with the essentials below, then add complexity as your tank matures and you identify a specific problem to solve.
Salinity Testing
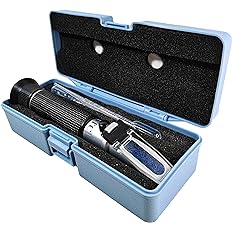
Every other parameter in a marine tank depends on getting this one right first. Hydrometers are the budget option but lose accuracy over time. A refractometer, like the Agriculture Solutions salinity refractometer with automatic temperature compensation, gives a sharper, more reliable reading and is worth the extra cost for how often you will use it.
FROM AMAZON.COM
Salinity Refractometer for Seawater & Marine Aquariums — 0-100 PPT
Reads salinity from 0 to 100 PPT with automatic temperature compensation. A reliable tool for reef tanks, saltwater fishkeeping, and marine setups.
Buy on Amazon.comAs an Amazon Associate, we earn from qualifying purchases. Happy Pet Zone may earn a commission when you click through to Amazon.com, at no extra cost to you.
Heating
Marine tanks run at similar temperatures to tropical freshwater tanks, but the stakes for a failed heater are higher since salinity and temperature interact. Size your heater to your actual tank volume rather than rounding up, and verify readings with an independent thermometer rather than trusting the heater’s built-in display alone. Our heaters and thermometers guide covers sizing and the most common failure modes in detail.
Filtration
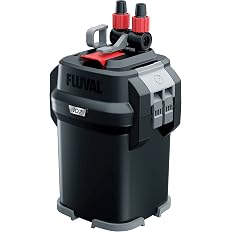
A quality canister filter handles mechanical and biological filtration well in a fish-only or FOWLR setup. The Fluval 107 performance canister filter suits tanks up to 30 gallons and gives you room for multiple media types as your tank’s needs evolve.
FROM AMAZON.COM
Fluval 107 Performance Canister Filter for Aquariums up to 30 Gallons
The Fluval 107 Performance Canister Filter provides mechanical, biological, and chemical filtration for aquariums up to 30 gallons.
Buy on Amazon.comAs an Amazon Associate, we earn from qualifying purchases. Happy Pet Zone may earn a commission when you click through to Amazon.com, at no extra cost to you.
Protein skimmers become genuinely important once you move toward a reef setup, since they export organic waste before it breaks down, but they are not mandatory equipment for a fish-only tank on day one. Our complete filtration guide and filter media guide go deeper on media selection and setup order.
Circulation
This matters more in saltwater than almost anywhere else in the hobby, and it only grows more important once corals are involved, since they depend entirely on water movement to feed and clear waste from their surface.
DC-powered pumps and wavemakers cost more than AC models but run virtually silent and let you dial in flow strength, including randomized, turbulent patterns that mimic natural ocean surge far better than one constant stream. Our full breakdown of flow targets and equipment lives in the water pump and circulation guide.
Lighting
Fish-only tanks need only enough light to view the tank comfortably. Reef tanks are a different story entirely, since corals need specific light intensity and spectrum to survive, and this topic alone deserves its own dedicated guide, which we will link here once it’s published.
For now, know that if corals are part of your plan, lighting is not a place to buy the cheapest option available.
Step 4: Mixing Saltwater the Right Way
Tap water is the first place beginner tanks go wrong. Chlorine, chloramine, phosphates, and dissolved metals in tap water all cause problems that are much harder to diagnose later than to avoid now.
An RODI (reverse osmosis deionization) filter strips these out before you ever add salt, giving you a clean, consistent starting point every single time you mix water. It is a bigger upfront cost, but it removes an entire category of mystery problems from your troubleshooting list later.
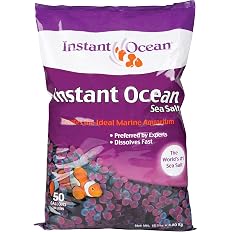
Once you have clean source water, mix in marine salt until your refractometer reads a specific gravity between 1.020 and 1.025, the range most fish-only and reef tanks target. Instant Ocean Sea Salt is a reliable, widely used option for fish-only and FOWLR tanks.
FROM AMAZON.COM
Instant Ocean Sea Salt for Marine Aquariums, 50 Gallons
Formulated for marine aquariums, Instant Ocean Sea Salt contains essential trace elements for marine fish and invertebrates. Its fast-dissolving formula helps prepare saltwater for routine aquarium maintenance while supporting a suitable pH for marine environments.
Buy on Amazon.comAs an Amazon Associate, we earn from qualifying purchases. Happy Pet Zone may earn a commission when you click through to Amazon.com, at no extra cost to you.
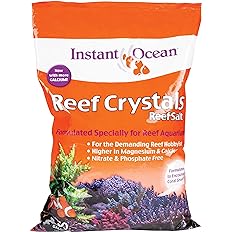
If you are building toward a reef, Instant Ocean Reef Crystals is formulated with additional calcium and trace elements that corals draw down faster than fish-only tanks ever will.
FROM AMAZON.COM
Instant Ocean Reef Crystals Reef Salt for Reef Aquariums, 50 Gallons
Specially formulated for reef aquariums, Instant Ocean Reef Crystals provides extra calcium, vitamins, and trace elements to help support the growth of corals, anemones, and other marine invertebrates. It is a practical option for preparing saltwater for reef tank maintenance.
Buy on Amazon.comAs an Amazon Associate, we earn from qualifying purchases. Happy Pet Zone may earn a commission when you click through to Amazon.com, at no extra cost to you.
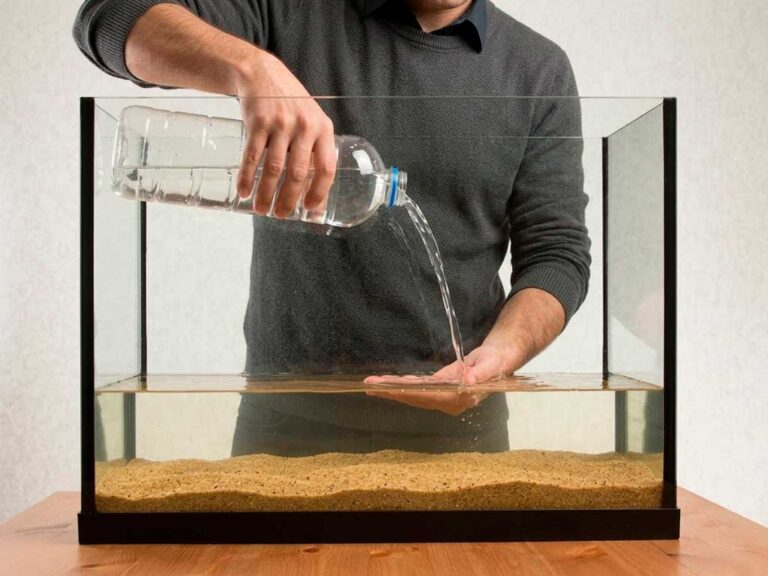
Mix salt into a separate container with a powerhead or pump running for at least an hour, and let the water aerate until fully dissolved before testing salinity. Cloudy or unmixed water will give you a false reading, and adding half-dissolved salt directly to a stocked tank risks a localized salinity spike that stresses fish and inverts alike.
Step 5: Live Rock, Live Sand, and Aquascaping
Live rock is porous calcium carbonate rock colonized by beneficial bacteria, and it does double duty as both biological filtration and the structural backbone of your aquascape. Live sand serves a similar purpose at the substrate level, seeding your sand bed with the same bacteria and small fauna that keep a natural reef system stable.
As a rough guide, 1 to 1.5 pounds of live rock per gallon gives most tanks enough surface area for solid biological filtration without overcrowding the aquascape. This topic has enough depth, curing rock, arranging for flow, avoiding pest hitchhikers, to earn its own dedicated guide, which we will link here once published.
The Nitrogen Cycle in Saltwater
The underlying biology is identical to freshwater: beneficial bacteria convert toxic ammonia into nitrite, then into far less harmful nitrate, explained step by step in our cycling troubleshooting guide.
What differs in saltwater is the timeline and the starting point. Live rock and live sand already carry some bacterial population, which can shorten the cycle compared to a bare freshwater setup, but marine bacteria also colonize more slowly overall, so most saltwater tanks still take 4 to 6 weeks to fully cycle.
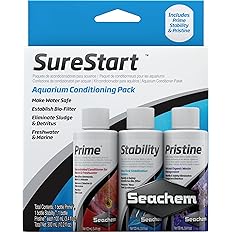
A bacteria starter product speeds this along without replacing the process entirely. Seachem SureStart works for both freshwater and marine setups and gives your tank a head start on colonizing the bacteria it needs, though you should still test daily and wait for ammonia and nitrite to both read zero before adding fish, rather than trusting a product alone to shortcut the timeline.
FROM AMAZON.COM
Seachem Sure Start Pack 3-100 mL/3.4 fl. oz.
Get your aquarium off to a good start with the Seachem Sure Start Pack. This three-product set offers a convenient way to prepare aquarium water and support a healthy environment for fish. Follow the instructions on each bottle to use the products correctly for your tank.
Buy on Amazon.comAs an Amazon Associate, we earn from qualifying purchases. Happy Pet Zone may earn a commission when you click through to Amazon.com, at no extra cost to you.
Common Beginner Mistakes
- Buying every piece of equipment on day one: A tank stacked with a skimmer, UV sterilizer, refugium, and reactor before it has even cycled tends to over-filter and over-clean the water, which starves corals of the nutrients they actually need. Add equipment as your tank matures and you identify a specific problem.
- Skipping a lid or mesh screen: Many marine fish, wrasses and gobies especially, are notorious jumpers, and even normally calm fish will jump if startled. An open-top tank without a screen is a genuine and avoidable way to lose fish.
- Using tap water instead of RODI: Chlorine, phosphates, and dissolved metals in tap water cause algae blooms and coral health problems that are far harder to diagnose after the fact than to prevent by starting with clean source water.
- Adding fish before the tank finishes cycling: Ammonia and nitrite need to both read zero, not just look low, before livestock goes in. Rushing this step is one of the most common causes of early fish loss.
- Chasing a single bad reading: Testing should reveal trends, not trigger a panic response to one number. A single slightly-off reading is rarely an emergency. A consistent trend in the wrong direction over several tests is what actually needs a response.
- Running two oversized heaters for redundancy: Backup heaters are a good idea, but two heaters each sized for the full tank can overheat the water badly if one sticks in the on position. Size heaters to split the load appropriately instead.
Choosing Your First Fish
Once your tank has fully cycled, resist the urge to stock it all at once. Add one or two hardy fish first, wait several weeks to confirm the tank stays stable with the added bioload, then add more gradually.
Clownfish, certain damsels, and gobies are commonly recommended starting points for their hardiness and tolerance for the small parameter swings a new tank still experiences.
A full species-by-species beginner stocking guide deserves its own article, which we will link here once it is live. For now, stability and patience matter more than which specific species you start with.
Quarantine Before You Stock
A separate quarantine tank is one of the best investments a beginner can make, even though it means buying a second, smaller setup before your display tank is even stocked.
New fish carry parasites and diseases far more often than sellers let on, and treating an outbreak in a bare quarantine tank is dramatically easier than treating one in a display tank full of live rock and corals, where many medications cause serious collateral damage.
Run new arrivals through 2 to 4 weeks of observation before they ever touch your main tank.
Acclimation matters just as much as quarantine itself. Marine fish and invertebrates are especially sensitive to sudden shifts in salinity and pH, so a slow drip acclimation, adding small amounts of your tank water to the bag or container over 45 minutes to an hour, gives the animal time to adjust rather than being dumped straight into different water chemistry.
Skipping this step is a common, avoidable cause of new arrivals dying within the first day.
Your Maintenance Routine
Daily
- Check temperature and salinity, especially in the first few months while you learn how your tank evaporates and drifts.
- Top off evaporated water with plain RODI freshwater, never saltwater, since only water evaporates and topping off with salt mix concentrates salinity over time.
- Observe fish behavior and equipment function for anything unusual.
Weekly
- Test ammonia, nitrite, nitrate, and salinity, tapering frequency once your tank proves stable over several months.
- Perform a 10 to 20% water change with freshly mixed, matched-temperature saltwater.
- Clean the glass and check equipment for salt creep or blockages.
Monthly
- Rinse mechanical filter media in old tank water, never tap water, and inspect biological media rather than replacing it wholesale.
- Test alkalinity, calcium, and magnesium if you are running a reef setup, since these deplete faster as coral growth increases.
- Check the calibration of your refractometer against a known reference solution.
Building Your Saltwater Knowledge
This guide is the starting map, not the final word on any single topic here. Protein skimmers, live rock curing, coral lighting, and beginner fish stocking each deserve the kind of depth a single section can’t fully deliver, and we will build those out as dedicated guides linked from this page over time.
Once your tank is up and running, our saltwater aquarium maintenance checklist covers the full daily-to-quarterly routine, including the tasks most guides skip. In the meantime, the fundamentals covered in our water chemistry guide, filtration guide, and circulation guide apply directly to your saltwater build, even though they were written with freshwater in mind first.
Frequently Asked Questions
Saltwater aquariums reward patience more than any other factor. Take the setup and cycling process slowly, resist the urge to stock too fast, and build your equipment list around what your tank actually needs at each stage rather than what looks impressive on day one.
Do that, and the learning curve is a lot gentler than its reputation suggests.
Once your equipment list is set, our protein skimmer guide for beginners covers sizing, setup, and troubleshooting in full. For the rock and sand that forms your tank’s foundation and biological backbone, our live rock and live sand guide covers live vs. dry rock, curing, and aquascaping.
And when it’s finally time to stock your tank, our best saltwater fish for beginners guide covers ten hardy picks and the classic advice worth ignoring. If corals are part of your plan, our best corals for beginners guide covers which ones actually forgive a new tank’s learning curve.